Bow hunting is considered to be an extremely primitive method of hunting which has been implemented by human beings for ages.
In fact, our ancestors have used this mode of hunting on a wide scale for many centuries and it is still followed by some primitive tribes living on the planet even today.
You might consider using a bow and arrow to showcase your hunting skills to your friends and also how skillful an archer you are.
In case you require tools for hunting or are struggling for survival in the wilderness, it might be imperative for you to learn the basic skills of making a bow and an arrow.
Below, we have thrown light on this topic. This article will be a great start for you to enhance your skills of making your own bow and arrow.
The Basic Steps of Making a Bow
There are the basic steps required to make a bow:
1. The first thing you need to do while preparing the bow will be to figure out what type of wood you are going to use.
For this, a branch will be required which is somewhat flexible. You will get the best branch from black locust, oak tree, teak, or hickory.
It is imperative for the branch to be dry as well as dead and it should not crack as well. Try to find a branch which is approximately the height of a man, around 6 feet.
Bamboo can also be used as a substitute, but make sure it is not very thick.
Bamboo canes have the propensity to be thick; and so, in case you want to employ bamboo make certain that it is thinner than normal.
2. The subsequent step will be to figure out the natural curve and flexibility of the bamboo cane.
You can do this by placing the cane on the floor and pressing the middle of the branch using your left hand.
In the meantime, use your right hand to pull one end of the bamboo in the upward direction so that you can curve the branch.
Take care to perform this meticulously while pulling gently.
Do not apply much pressure since it might break the branch in that case.
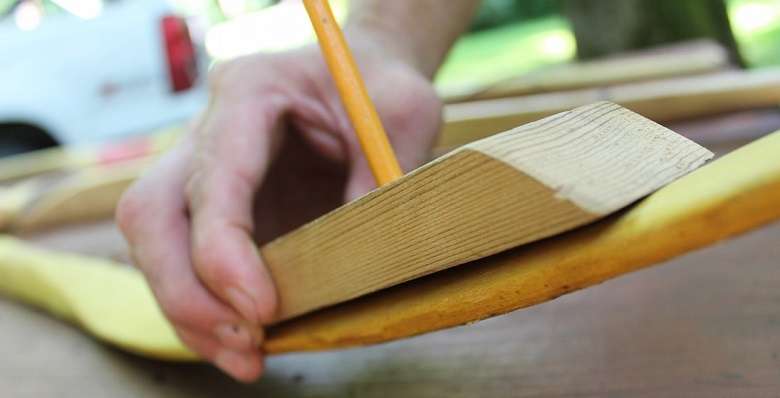
3. Next, you need to figure out your handhold on your bow.
Although this step might appear to be unnecessary, it is vital too.
In case you need to react quickly, you need to get hold of your bow immediately without looking for it.
For this reason, it will be imperative to set marks beforehand.
Make it a point to determine the middle point of the branch and then measure 3 inches from the central point up and down the branch.
Set marks by cutting small indentations on both these places and ensure that they are visible and also permanent.
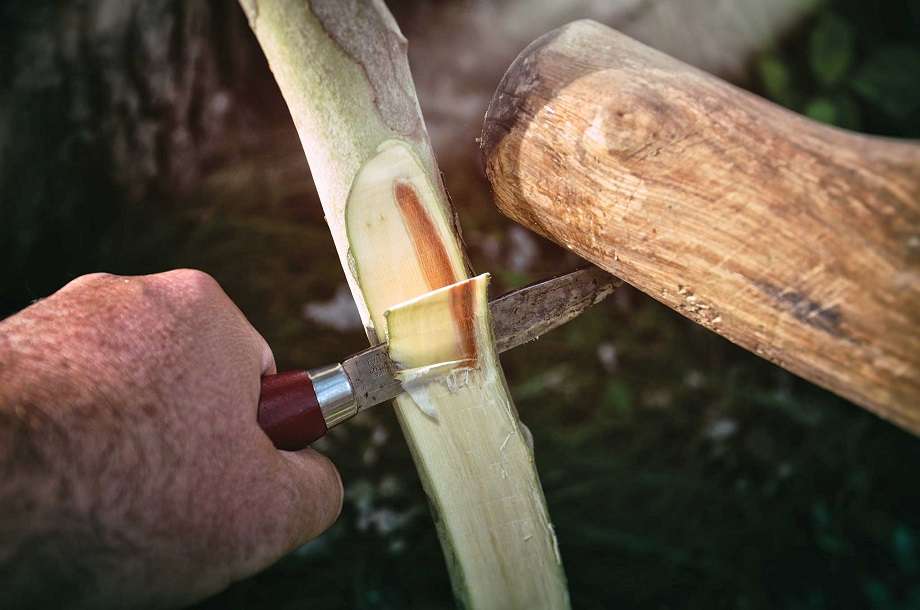
4. One more essential step in shaping the bow will be to figure out the harder locations of the wood.
While placing one end of the wood on the floor, put the other end at the top using your hand.
Begin to curve the branch while holding the bottom part using your leg and continue holding it using your hand too.
Figure out whether there is an area that appeared to be less flexible and shave off any wood from that.
Cut the branch in small pieces, preferably with the help of a pocket knife or tactical knife. The reason for doing this is to make the bow flexible on both sides.
5. Do not forget to check your progress from time to time.
However, do not overdo this step given that you might spoil the whole wood piece in that case.
You ought to finish with a bow which features an identical diameter uniformly across the branch, plus identical flexibility as well as a curve.
We like to mention here that it is crucial to keep the central part the hardest (for your grip) and do not change its thickness than what it was originally.
In a nutshell, shave the wood only on those 2 limbs which are positioned on top of and below the hand-hold region.
Besides this, shave the wood only on the tender areas which are also known as the “belly” region. While shaving the piece of wood, get rid of only the bark while avoiding the softer and inner part of the branch.
Else, your bow will be susceptible to breaking easily. In case it is imperative to shave the bark, make it a point that it is the strongest and the thickest area which is less flexible as well.
6. Make it a point to work in symmetry.
It is important for every limb of the bow to be uniformly flexible and long and they should likewise be able to endure the identical amount of strain plus make a smooth arc while it is bent.
Essentially the manner in which the limbs are curving will make the arrow fly once tension is applied to them by tugging the arrow back again on the string.
Needless to say, you must take care that the limbs are not excessively thin so that they might break.
It is important that the middle part of the bow should be the strongest and thickest.
Ensure to polish the whole bow with sandpaper in case you do have one given that it will help to get rid of any hard area on the surface of the bow that can damage your hands while you are holding it.
If possible, make use of different grits starting with the toughest one and then slowly changing to a finer surface.
7. Prepare the bow for the string.

For this, you need to cut 2 notches at both ends of the bow and you will tie the bowstring right here.
Do not cut the wood too much for making the notches since it might rob the bow of its strength.
Thus, it must be obvious to you by now that a lot of cutting will be required for this project and you need a strong survival knife for performing the task flawlessly.
8. Select your bowstring.
All of them have different properties; however, the common options must be equally good.
Take care that the string is not elastic in nature.
The bow will derive its strength from the flexibility of the limbs made from wood, and not from the string.
You might be required to face a tough time while you are in the forest in order to come across a proper alternative for the string; consequently, it is important to prepare in advance to avoid any headaches in the long run.
Else, you can go for hemp cord, nylon rope, rawhide, twine, and so on.
It is important to remember that nylon might be heavier and also the arrow might not receive the strength needed to fly far.
For this, you require a strong string which is also light. Polyester is going to be the best material that you can find on the market at present.
If possible, employ multiple strings while tying them to one another for enhanced strength. In this way, you are thickening the eventual bowstring by using several strings instead of one.
9. Tie the string around it.
For this, use the notches to tie some part of the string around the end of the bow.
After making a knot at each end, tie a portion of the string rather loosely.
Your objective will be to maintain the tightness of the string as well as the bow. You can achieve this by untying less of the length of the string as compared to the length of the bow.
10. Now it is time for you to test the bow by stretching it a few times.
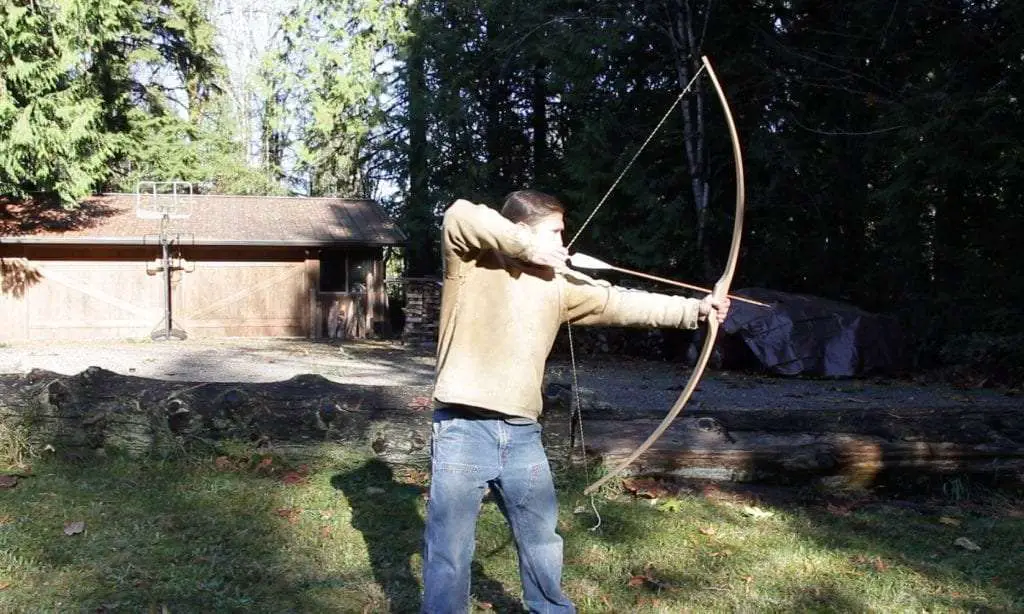
The bow can be placed on a branch so that it is possible to pull the string in the downward direction for testing its strength.
However, take care not to pull very hard since it might cause the bow to break.
In general, make sure that the bow is able to hold back the distance up to your jaw from your arm extended full-length. Be prepared to shoot once you are in the position of an archer.
In case you happen to be a beginner bow hunter, it will be advisable for you to select the appropriate bow.
Do not go for a bow which is excessively hard for drawing or aiming which will make the task of learning difficult.
You likewise need a fully functional bow.
It will be of no use to invest your hard-earned cash on a good quality beginner compound bow and replace it within only a few months.
Compound bows are easy to use as compared to the traditional recurve bows out there. Make it a point to look at some authentic beginner compound bow reviews on the web which will give you a fair idea regarding which one to go for.
Compare several of them and judge their pros and cons before making your final decision.
The Basic Steps of Making an Arrow
The basic steps of making an arrow:
1. The specifications for the wood will be different while making an arrow.

For this, you require to look for branches which are straight instead of being curved. This is because the arrow’s trajectory can be changed by any visible curve when you shoot it.
However, make sure that the branch is nevertheless alive apart from being at least 50% of the bow’s length. The arrow must also be considered as per the full potential of the bow when stretched.
Remember that you will not be able to use the arrow in case it is shorter than the distance from the jaw to your fully stretched arm.
2. Next, you need to figure out what wood you’re going to use.
It is advisable to make use of green wood; however, ensure that it is properly dried in the sun.
It can also be dried quickly by placing it on top of a fire. However, the most effective way to dry the arrow will be to allow it to dry for a few days which is known as “seasoning”.
Following this, you can remove the bark safely. When it comes to arrows, goldenrod and mullen are useful plants whatsoever.
Apart from being strong, they are also straight and you’ll find them in open fields and areas. You may also go for dogwood, plum tree, as well as hazel.
3. Even though the arrow might be straight, you might require to make it straighter.
For this, make use of fire but take care not to burn the arrow.
Make sure it is exposed to the heat only slightly without impairing the wood’s structure.
Once it becomes cool, make it perfectly straight. It will be a sensible idea to put some weight on it so that the arrow can be flattened out at the end.
4. The arrow’s tip might be needed to be carved with the help of a knife.
Your objective will be to create a sharp tip.
For this, you might need to place the arrow for some time on top of a fire so that it is possible to make the tip hard.
Again, take care that the wood does not get burnt.
Additionally, make sure to create a notch at the end of the arrow where it is going to come in touch with the string.
In this way, the arrow will come in contact with the string comfortably without shifting sideways.
5. You may also make an arrowhead as an additional step.
For this, you can use different objects like bone, glass, stone, or metal.
Make the arrowhead appear sharp and pointy by using a stone for chipping it.
Following this, use a sharp stone or a hammer to create a notch within it.
Subsequently, the arrow has to be placed in the notch and you need to tie the arrowhead using a string or thread.
6. An additional step, you might also try to enhance your hunting skills by making fletchings.
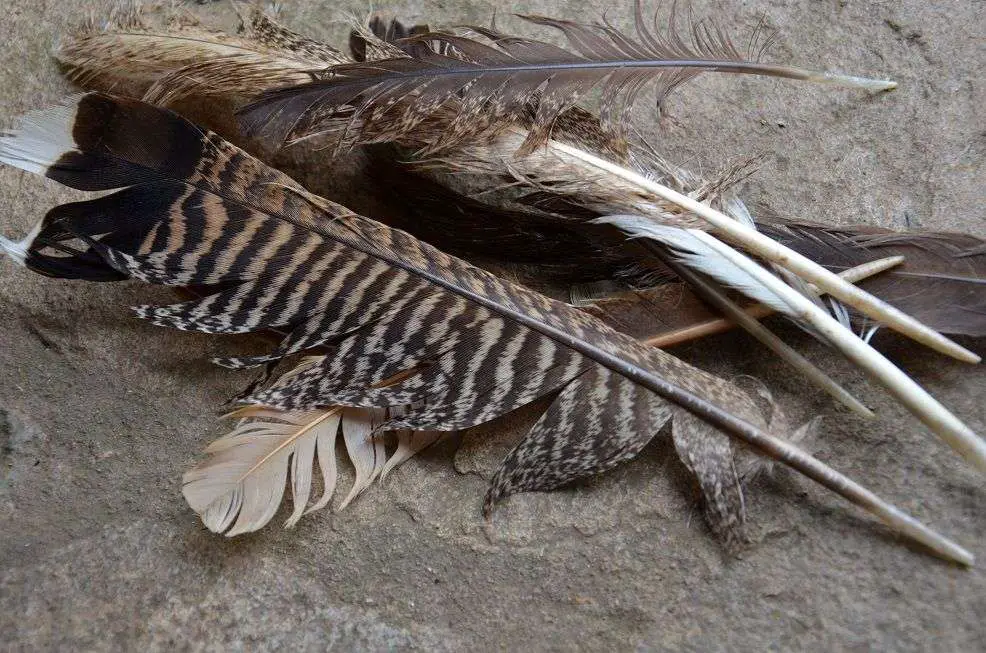
For this, anything that is light and thin can be used.
Typically, feathers will be your best option. The back end of the arrow can be carved for sliding in the fletchings or you can use an adhesive to paste them and tie thread or cord around them.
As mentioned earlier, these are not imperative to make your hunting experience an enjoyable one; however, they will be able to enhance your position as well as the flight of the arrow too.
They are going to function in the same way as the rudders of the small aircraft by gliding gently through the air. Fletchings can likewise enhance the speed of the arrow although not by much.
The feather fletchings can be used in another way by helping the arrow to spin once it is shot. This will enhance the precision eventually. In case feathers are not available to you, you can go for thick paper or plastic instead. You need to cut 3 triangles which should be uniformly spaced on the rear end tip.
It is imperative to bear in mind that you will not be able to master the usage of the fletching without practice and experience. You will not require them in case you only need to survive and hunt.
Essential Tips on How to Use the Bow and Arrow
- While aiming and shooting, never place the bow and the arrow near your face. Otherwise, you might even injure yourself in the long run.
- One more helpful tip will be to make use of cord that we use for hunting. This will prevent you from losing your catch which you hunted and also help you draw it in your direction.
- Never fire unless required and without any arrow. (We call this “dry fire”). This will shorten the lifespan of the bow in the course of time and it might also be impaired much faster.
- It is important to bear in mind that the lifespan of a bow is not more than a few months. The wood is going to dry out over time and can even break eventually. Consequently, make it a point to make a fresh bow and arrows every 4 to 5 months.
- It will be a sensible idea to make a habit of carrying a cord or string whenever you venture out for hiking or camping. At least you will have the cord available to you in case you need to make a bow urgently. It is the only piece in the bow you will find difficult to create from scratch in the darkness.
- Moreover, bear in mind that it is not easy to hunt using the bow and arrow and you need adequate time and practice to become familiar with the equipment so as to deal with them effectively.
- One more effective guideline for maintaining the health of your bow will be to unstring it while it is not being used. This will help to relieve the pressure on the bow and it’ll get sufficient time to come back to his original form. Also, remember that it will be possible for the arrow to fly faster in case stronger pressure is applied by the wood on the string.
- Our last tip in this list will be not to give your bow to an inexperienced person. This is because he or she might cause serious damage to the bow in case it is not properly handled.
Final Notes
Take care not to use the bow on any human being or any pet. If you want to use it for hunting in the wilderness use it without any restriction.
However, make sure you are legally permitted to do so. Else, you might end up being convicted because of breaching the regulations.
Never give your bow to any children who do not have any idea of how to handle it. Moreover, they can even hurt themselves as well as somebody else.
We like to end this article by advising you to handle your bow and arrows meticulously and use them only in extreme cases (for instance, when you need to survive).
Remember, practice makes a man perfect and you need to practice extensively for becoming a better archer.